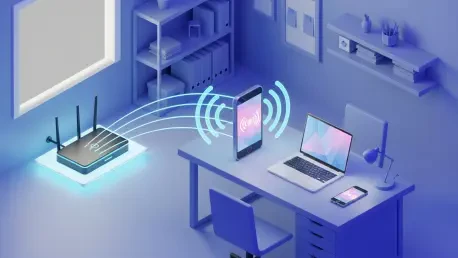

Persistent wireless dead zones remain a frustrating reality in many modern households, even as networking technology continues to evolve rapidly through the middle of this decade. While high-end mesh systems offer a robust solution, the financial investment required for such upgrades can be significant for many users. An overlooked alternative exists within the cluttered drawers of most households, where retired smartphones frequently sit unused despite possessing capable wireless radios. Repurposing an old Android device as a Wi-Fi range extender provides a sustainable and cost-free method to bridge the gap between a primary router and a signal-deprived corner. This approach transforms a piece of electronic waste into a functional networking tool, leveraging the phone’s ability to receive a signal and rebroadcast it to nearby gadgets. By understanding the specific configuration steps required to bridge these connections, homeowners can effectively eliminate frustrating buffering and connectivity drops without purchasing additional equipment.
1. Initial Configuration: Establishing the Primary Network Bridge
The first phase of this transformation involves ensuring that the secondary Android device maintains a stable and high-speed connection to the existing local area network. Users must navigate to the system settings and select the primary Wi-Fi SSID, entering the necessary credentials to establish a solid link. This connection serves as the source for all data that the phone will eventually rebroadcast. It is essential to verify that the phone is not experiencing intermittent drops during this stage, as any instability at the source will be magnified once the signal is extended. Since older hardware may have different antenna sensitivities, testing the reception strength in various locations near the main router can provide a baseline for expected performance. Once the connection is confirmed, the device essentially becomes an active node capable of passing traffic between the main access point and the client devices that will eventually connect to it.
After establishing the primary link, the focus shifts to activating the specific software features that allow the phone to share its internet access. On most standard Android builds, this is accomplished by navigating through the Network and Internet menu to the Hotspot and tethering section. For those utilizing Samsung Galaxy devices, the path typically involves the Connections menu under Mobile Hotspot and Tethering. Enabling this feature tells the operating system to utilize its internal Wi-Fi adapter as both a receiver and a secondary transmitter. While traditional hotspots often rely on cellular data, modern Android versions allow the device to share an existing Wi-Fi connection, effectively functioning as a network repeater. This dual-mode operation is the technical foundation of the extender setup, allowing the phone to bridge the gap between the main router and remote areas. Maintaining a clear understanding of these menu paths ensures that the setup remains accessible for future adjustments.
2. Practical Deployment: Optimization and Strategic Hardware Placement
Customizing the network credentials and frequency bands is a vital step in ensuring both the security and the efficiency of the extended wireless coverage. Within the hotspot configuration menu, users should assign a unique SSID and a strong password to distinguish the extended signal from the primary home network. Selecting the appropriate frequency band—whether 2.4 GHz for better range or 5 GHz and 6 GHz for higher throughput—can significantly impact the user experience. For instance, the 2.4 GHz band is often more effective at penetrating walls, making it ideal for extending signals into distant rooms or basements. Furthermore, disabling mobile data is a critical precautionary measure to prevent the device from accidentally consuming cellular bandwidth if the Wi-Fi signal wavers. Navigating to the SIM settings to toggle off data or physically removing the SIM card ensures that the extension remains entirely dependent on the local network, thereby avoiding any unexpected data charges or billing issues.
The final stage of the process involved the strategic placement of the Android device to maximize the reach of the newly extended signal. To achieve the best results, the phone was positioned in a “middle ground” area where it still received a strong signal from the main router while being close enough to the dead zone to provide adequate coverage. Placing the device directly inside a signal-deprived area resulted in poor performance, as the phone struggled to maintain its own connection to the source. Additionally, because the active transmission of data consumed significant battery power, keeping the device permanently connected to a wall outlet was necessary for continuous operation. Once the hardware was physically situated and powered, users performed a speed test to verify that the latency and throughput met their specific requirements. This setup was effectively implemented by those seeking a quick fix for isolated connectivity issues, proving that older technology still played a vital role in modern home networking.